In part 0 of this series, I explained why there is a landline in my house again. From this post on, it’s about the how. Before touching a single configuration screen, let’s first look at what the pieces are, how they connect, and which number each phone gets. That’s what this part is about.
The building blocks
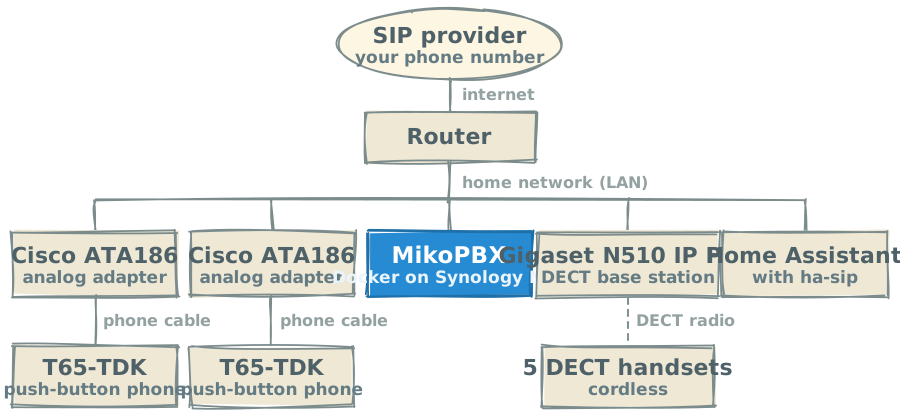
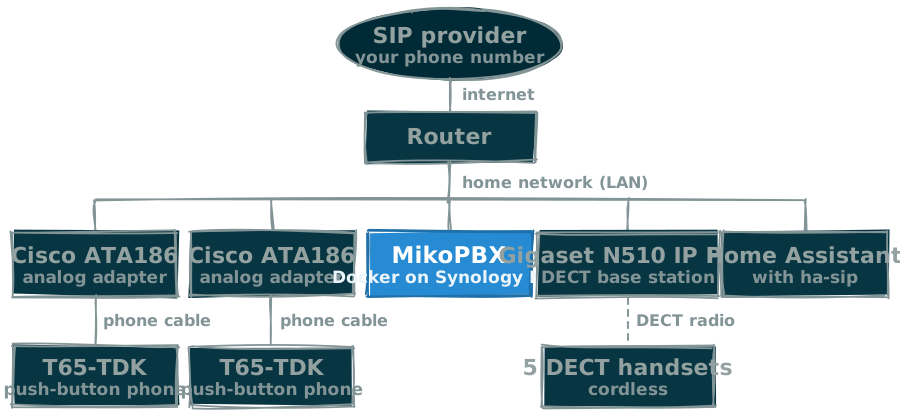
A home phone system needs four kinds of components. Everything talks SIP, the standard protocol for internet telephony.
The phone system (PBX). PBX stands for private branch exchange: the telephone exchange of the house. Every phone registers with it, it routes calls between phones, and it connects the house to the outside line. I use MikoPBX,1 an open-source PBX built on Asterisk with a friendly web interface. It runs in Docker on my Synology NAS, which is on all the time anyway.

Analog telephone adapters (ATAs). An ATA turns an old-fashioned phone into a SIP phone. The T65 plugs into the adapter and thinks it’s on a normal phone line. The PBX just sees another SIP phone. I use two Cisco ATA186 adapters, one next to each phone. They’re old, but cheap second-hand and they do the job. (I paid €5 each.) If you buy one, make sure it runs SIP firmware, version 3 or higher: the ATA186 also shipped with firmware for other protocols, such as Cisco’s own SCCP. More on that in the part about the ATA. There are other ATAs available too. I see quite a lot of Grandstream ATAs, and the occasional AudioCodes MP-202. I think these would work too, but I haven’t tested that.
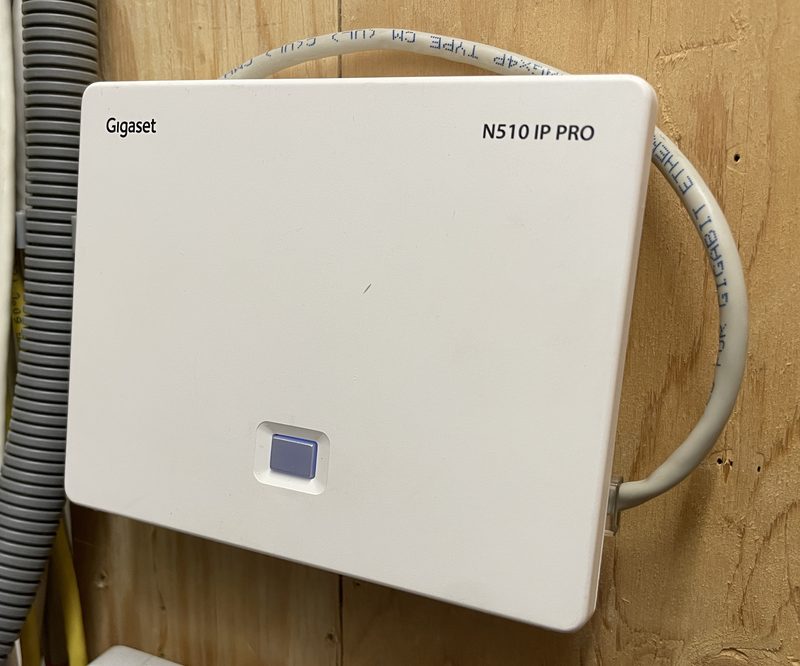
A DECT base station with SIP. For cordless phones I use a Gigaset N510 IP PRO. It supports up to six handsets, each with its own SIP account, so every handset gets its own extension. It’s powered over Ethernet, so it only needs one cable. The base station hangs in my meterkast.2 (I think the N300 IP would also do the job, but I bought the N510 second-hand and the price difference was negligible.)
A SIP trunk. This is a VoIP subscription from a telecom provider and it gives you a real phone number. The PBX registers with the provider just like a phone registers with the PBX.
And because everything speaks SIP, other things can join in too. Home Assistant, with the ha-sip add-on, is simply one more extension. I’ll talk about that in part 6.
Why these choices
MikoPBX instead of FreePBX, FusionPBX, Issabel or plain Asterisk. MikoPBX wasn’t the first PBX I looked at, but it was the only one that runs well in Docker and still has a friendly web interface. Plain Asterisk gives you full control, at the price of writing all configuration files by hand. For a homelab that already runs Docker, MikoPBX was the best fit. I’ll go into the alternatives I tried in part 2.
ATA plus vintage phone instead of a modern SIP desk phone. A modern SIP phone would be simpler: no adapter, one less device to configure. But then there’s no T65 in the living room, and that was half the fun. (Plus: who wants a modern desk phone in their living room that screams “business!” just by its looks?)
One thing to check before you buy: the T65-TDK has push buttons and dials with tones (DTMF), which every ATA understands. Rotary phones dial with pulses, and many ATAs can’t handle those.
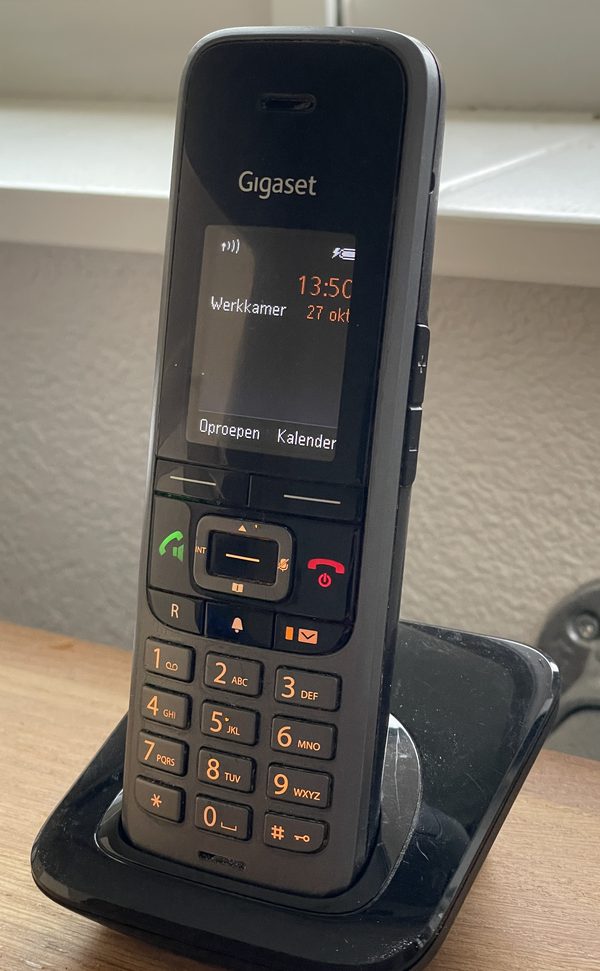
DECT handsets instead of an app on a smartphone. Plenty of SIP apps exist, but a smartphone app defeats the whole purpose of this project. A DECT handset can make calls and nothing else.3
A dedicated PBX instead of the router’s phone features. My Fritz!Box router has an analog phone port and a DECT base built in. Why not use that? That would be much simpler, right? Yes, it would be, and I tried it. However, to keep things simple, the Fritz!Box makes quite a few choices for you, like the numbering plan, which requires internal numbers to start with **. On top of that, my Fritz!Box happens to have only one analog port, and I want two of those T65 beauties in my living room. So it wasn’t suited for my needs. That said, I want to call out that Fritz!Boxes are amazing devices, and I really like that they have all this integrated. If you can live with the limitations, it’s a much simpler route.
A numbering plan
Decide on your numbers before you configure anything. Changing them later means touching every device.
My rules:
- Every phone gets its own two-digit number. Two digits is enough for my house, and short numbers are quick to dial.
- No internal number starts with 0. In the Netherlands, every outside number starts with 0: 06 for mobile, an area code like 0341, 0800 for free numbers. If no internal number starts with 0, the PBX can tell them apart by the first digit. Anything starting with 0 goes to the outside line. No “dial 0 for an outside line” needed.
- Keep the 1x range free. If 11 is an extension, the system connects you as soon as you’ve dialed 1-1, and 112, the emergency number, never gets through. The same goes for other short numbers starting with 1, like the 14 numbers of municipalities.
Here’s how I divided the numbers:
| Numbers | Used for |
|---|---|
1x |
Not used, to keep 112 and other 1-numbers working |
2x |
Phones on the ground floor |
3x |
Phones on the first floor |
4x |
Phones on the second floor |
5x |
Services, like Home Assistant and the kitchen timer |
0... |
Outside line |
The network
All devices sit on the normal home network. Two things are worth arranging upfront:
- Fixed IP addresses for the PBX, the ATAs and the DECT base, either static or as a DHCP reservation in your router. Phones need to find the PBX at the same address every time.
- No port forwarding. The PBX registers with the SIP provider from the inside, and incoming calls arrive over that same connection. There is no need to open SIP ports to the internet, and you really shouldn’t: open SIP ports attract a constant stream of break-in attempts.
The Docker networking details, which are the trickiest part of the whole setup, are for part 2.
Next up
In part 2 we install MikoPBX in Docker on a Synology NAS.
-
MikoPBX wasn’t my first choice: being maintained by a Russian company doesn’t count as a recommendation in my book. Why I chose it anyway is explained under Why these choices. ↩
-
The meterkast is the cupboard near the front door that every Dutch house has, where the utility meters, the fuse box and, these days, the internet connection live. Learn Dutch For Expats explains it in more detail. ↩↩
-
Before I had any hardware, I did some testing with a SIP app. I found out that a self-hosted PBX and a SIP app that works fully locally don’t work well together on an iPhone anyway, because of Apple’s restrictions on push notifications. In practice, such an app only receives calls while it’s in the foreground. Some apps work around this with a push service run by the app maker, but then your setup is no longer fully local. Not an issue for me, since I only used it for testing. But it’s good to know if you’re considering something similar. ↩